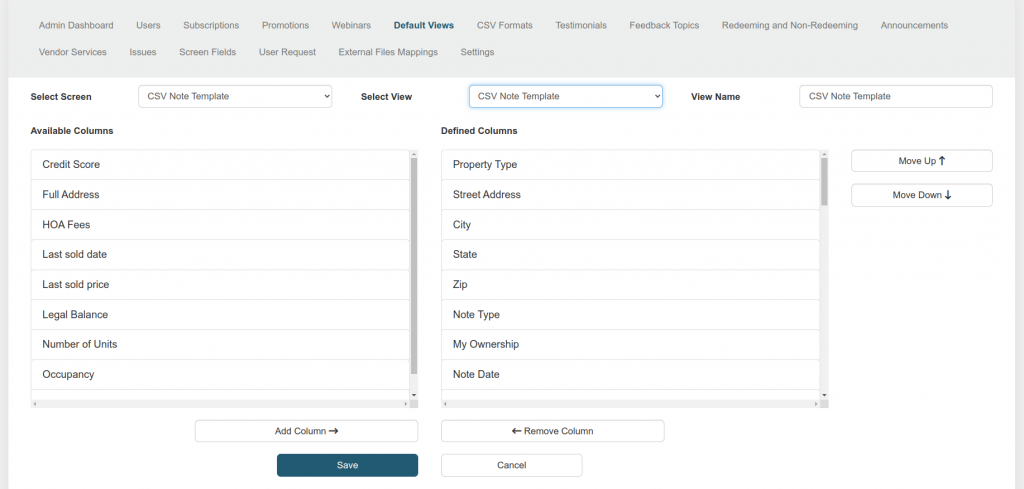
Select the desired screen: Choose the screen you want to edit from the first drop-down menu labeled “Select Screen.”
Select the desired view: Choose the specific view within the selected screen from the second drop-down menu labeled “Select View.”
After selecting the screen and view, the name of the selected view will be loaded into the “View Name” field. You can edit this field if you need to change the name of the view.
Below, you’ll see two lists:
Available Columns: This list displays all the screen fields that you can potentially add to your defined columns.
Defined Columns: This is the target list where you’ll add the selected screen fields.
You can add screen fields to the Defined Columns list in two ways:
Click to Add:
Click on the desired field in the Available Columns list.
Click the “Add Column” button located at the bottom of both lists.
The selected field will be removed from the Available Columns list and added to the Defined Columns list.
Drag and Drop:
Click and hold the desired field in the Available Columns list.
Drag the field to the Defined Columns list and release the mouse button.
There are two ways to remove screen fields from the Defined Columns list:
Click to Remove:
Click on the desired field in the Defined Columns list.
Click the “Remove Column” button located at the bottom of both lists.
The selected field will be removed from the Defined Columns list and added back to the Available Columns list.
Drag and Drop:
Click and hold the desired field in the Defined Columns list.
Drag the field to the Available Columns list and release the mouse button.
After working with screen fields, click the “Save” button.
Table of Contents
Thank you
Thank you for contacting us, a support agent will get back to you in
the next 24-48 hours!